WingtraHub has specific parameters for the type of custom elevation data that it allows. Two key restrictions are resolution (> 1m/pixel) and file size (< 2GB).
In DroneDeploy, the coarsest resolution for DEM export is at 50cm/pixel. Unfortunately, this does not meet the resolution requirement of WingtraHub for custom elevation data import. As such, this workflow outlines a process that will allow DroneDeploy users to export a suitable elevation dataset and consequently post-process the output through QGIS, a free GIS software, so that it can be configured to meet the WingtraHub restrictions.
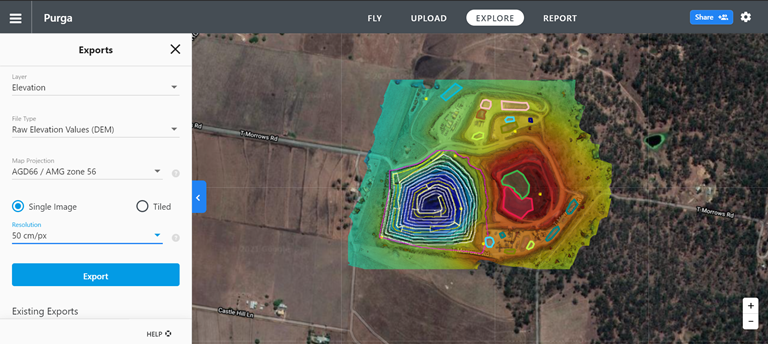
Part 1. Downloading the Data from DroneDeploy
When exporting the data from drone deploy, you will need the elevation layer with raw elevation values (DEM) for the file type. Select a local coordinate system whose horizontal and vertical units are in meters.
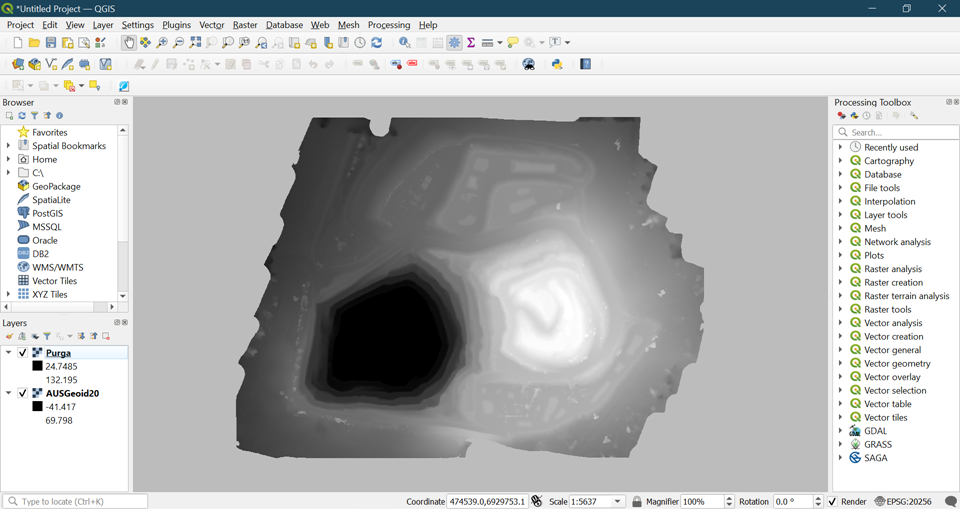
Part 2. Convert Heights to Orthometric
By default, the DEM values that are going to be downloaded from DroneDeploy will have ellipsoidal heights. As such, you will need to correct these to acquire the orthometric heights by using your local geoid. This website compiles all the common geoids for various major geographical regions. Make sure to select one that is compatible with your CRS.
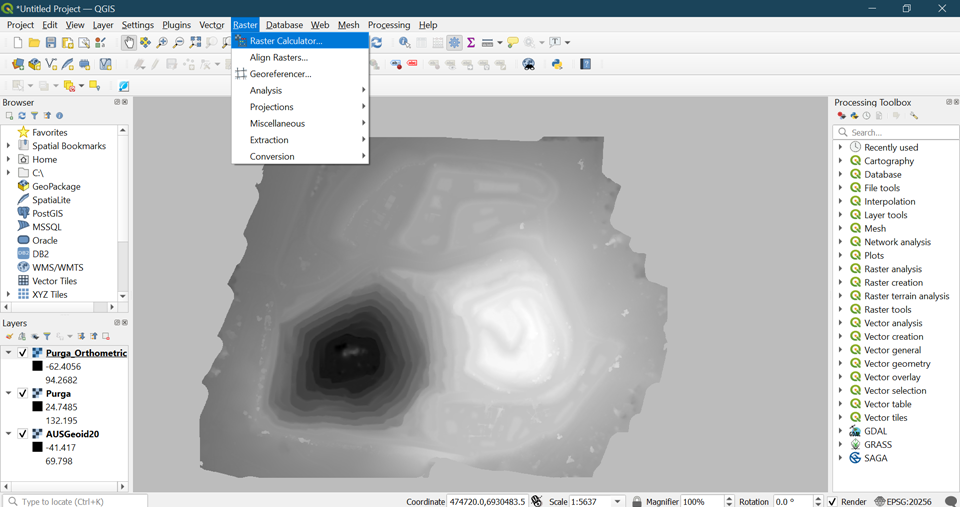
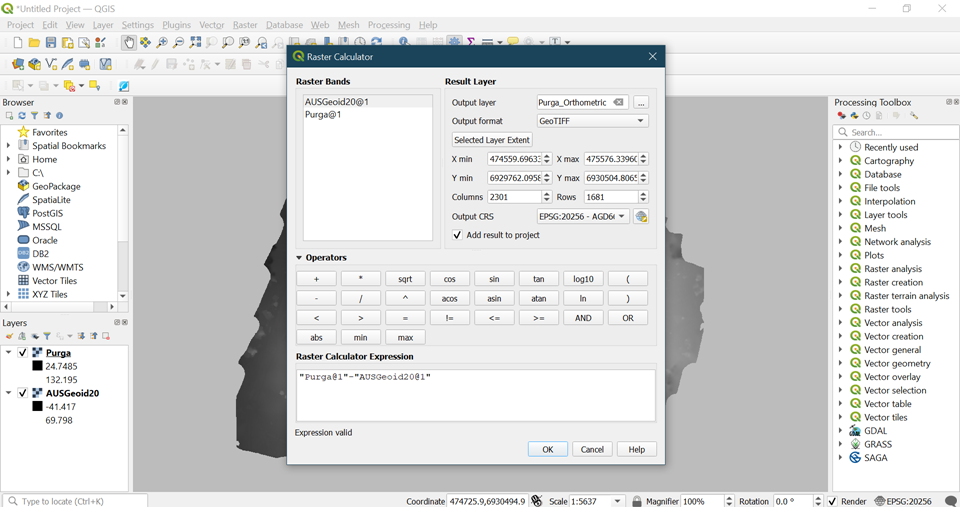
If you have a TIFF file for the corresponding geoid, you can do the correction in QGIS. To do this, open both the DEM and the geoid in the software and go to the raster calculator by selecting Raster > Raster Calculator. You will have to subtract the geoid values from the DEM values to get the orthometric height. Make sure to use the same layer extent and CRS as your DEM.
Part 3. Resample the DEM to the Intended Resolution
Now that you have a DEM that shows the orthometric height, the next step is to resample so that you meet the WingtraHub parameters. To do this, go to Raster > Projections > Warp (Reproject). The only two values you need to set here are the output file resolution and the file name and location of the resampled output.
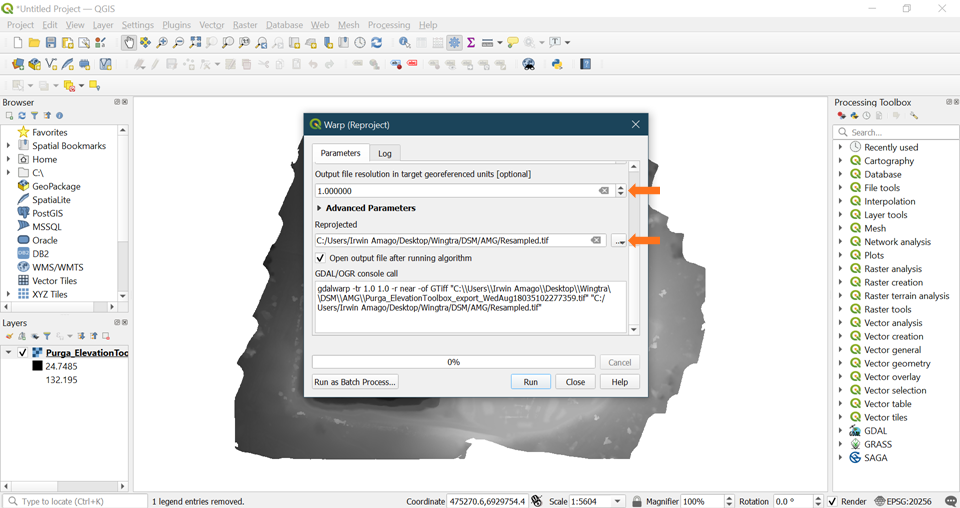
You can go as low as 1m/pixel. However, if the file size is large and you are also facing an issue with meeting the 2GB maximum limit, you can go even coarser to reduce the size. Note that you should exercise diligence here. If the terrain is changing rapidly, then a very coarse resolution may mean missing undulations in the elevation values. In that case, going too coarse defeats the purpose of importing a custom elevation data set because you fail to capture the specificity of the terrain.
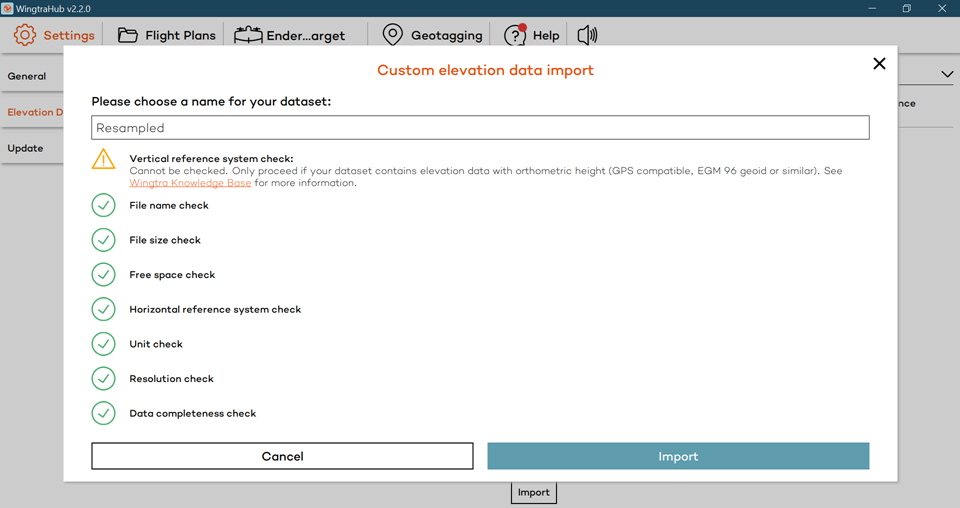
Part 4. Verify the Process by Loading into WingtraHub
As a final step, to ensure that you processed the DEM correctly, load it into WingtraHub. It should pass all the checks set up by the software. It is also highly recommended that you carry out the elevation check in the next step after importing to verify that the data makes sense.